Have stencils made and then spray airbrush pictures
If you enjoy airbrushing pictures, you know how important stencils can be. If you have no way of making them, you can have some made for you.
What you need:
- Airbrush equipment
- Stencils
- motive
Specialists to have stencils made
In order to have stencils made for airbrush, you should find out which manufacturer should be considered for this task in special forums on the Internet. You should also find out which provider has received the best user comments. If necessary, take a look at the homepage of the respective artist.
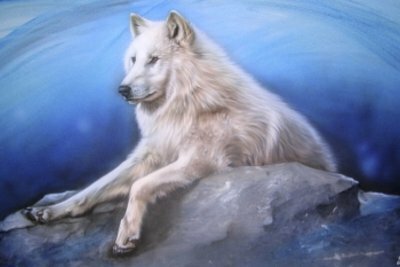
- Once you have found a good manufacturer, it would be very good if you knew which stencils you would actually like to have made. You should have a picture or drawing that you will then want to create an airbrushed image from. You should then submit this image to the manufacturer as a template.
- The image will then most likely be scanned into a computer and edited. The stencils are made from slightly more stable foils. For example, if you want to create an animal head, you may need up to five or six different foils.
- The foils are then processed with a cutting plotter so that details are cut out of the special foils. Every single slide has a different appearance. For example, one film is only intended for the outline, another perhaps only for the ears, nose and eyes of the animal's head.
- It is important to ensure that cut-out parts are also important to you. You should have the individual slides numbered so that you then know exactly which one to start with and which one will finish off.
Make stencils for airbrush work from Mylar foil
If you want to spray beautiful motifs on different surfaces using the airbrush process, ...
Airbrush is applied as a picture
- Now that all stencils have been made, you can apply the airbrush to your Underground spray on. However, you should take a close look at your subsurface. For example, if the image is sprayed on the hood of your car, you need to have the relevant area prepared accordingly.
- When that's done, you can put on the first foil you had made and paint it over.
- After a short drying time, remove the first foil and put on the next, then spray the color intended for foil 2 and let it dry again.
- Proceed in this way with all the stencils until the complete picture is ready.
- Then you should spray another layer of clear lacquer if necessary - and your airbrush is ready.
Before you spray your first airbrush painting on your hood, consider attending a special training event first.
How helpful do you find this article?