
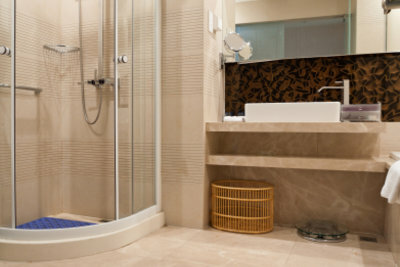
Build your own wooden washstand
A washbasin that offers plenty of storage space for towels, cosmetics, brushes, hairdryers and much more finally creates order in the bathroom. In addition, such a decorative piece of furniture made of fine wood conceals unsightly pipes and adds the finishing touch to any neat ambience. Even beginners can build a wooden washstand themselves with some materials from the hardware store.
What you need:
- four solid wood panels
- boards
- Connector parts
- Wood screws
- Shelves
- Clothes rail
- Jigsaw
- Cordless screwdriver
Planning and designing the washbasin
- The easiest way to build a washbasin that is up to one meter wide and that is sufficiently stable even without central supports.
- Measure the height to below that sink exactly, with standard constructions the distance is 85 cm. You can plan the vanity so that it ends with a ceiling plate under the sink, or you can countersink the sink into a hole drilled in the plate.
- For the two side parts you need sturdy solid wood panels with a thickness of at least 2.5 centimeters. For the back wall, on the other hand, you can choose a thinner board or build a more stable construction with several solid wooden boards attached across. Depending on whether the washbasin can be seen or with Doors should be closed, choose the optically more beautiful or the more robust variant.
- For the desired depth, measure the distance between the front edge of the sink and the Wall off and add at least 10 centimeters, so that the finished bathroom furniture will later be the basin towers above.
- You should also consider whether you want to insert shelves inside or possibly attach a crossbar as a towel holder.
Build beautiful bathroom furniture yourself - instructions for bathroom cabinets
Should you ever need something extraordinary for your bathroom furnishings ...
Assemble bathroom furniture out of wood
- First, connect the lower plate to the side panels. To do this, pre-drill holes in the edges of the side parts and screw the base plate with them.
- Then connect the side panels and the rear panel by screwing the rear panel into pre-drilled holes from behind.
- Now you have to saw an incision in the upper panel from the back, in which the water drain will later disappear. If you have opted for a higher washbasin with a recessed basin, a larger, centrally recessed area must be adapted exactly to the dimensions of the washbasin. In this case, it is best to have the wood panel cut to size by an expert.
- Now place the ceiling plate on the construction and connect it to the side parts from the inside using connector parts or angles and screws. For fastening with common connector parts, you have to pre-drill holes on both parts and then countersink the cams in the holes.
- If necessary, you can attach the washbasin to the wall with a strip construction and dowels for even greater stability.
- Finally, work out the inner workings, for example with a crossbar in brackets or with shelves placed on strips, and attach doors as you wish.
How helpful do you find this article?