
VIDEO: Leak detection on the heater
Detect a leak in the heater
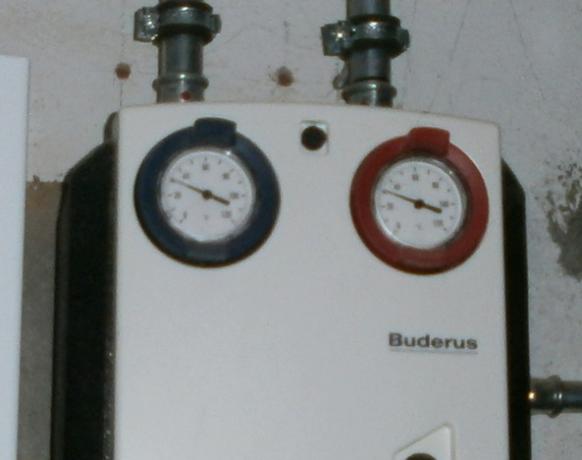
At the heater a manometer is attached to show the pressure in the system. If this falls, it is missing water in the heater. Such a drop in pressure could indicate a leak.
Manometer on the heater
Refill water while watching the water clock. Make a note of how much water you have to add before the pressure is correct again. Pay attention to whether you will have such a pressure drop more frequently in the next few weeks. If so, a leak could be the cause.
Water clock
You rarely have to remove the radiator valve, but it is still ...

Watch to see if the pressure continues to drop if you don't replenish. If this levels off at 0.6 bar, for example, you can assume that there is a leak on the upper floors. If it drops to zero, there is a lot to be said for a defect in the pressure compensation tank or a leak in the cellar.
Three signs of a leak:
- The pressure keeps falling.
- A larger amount of water must be topped up before the pressure is correct again.
- The pressure won't drop to zero if you don't top up.
Tips to find leaks
By filling it up, you know how much water is coming out of the heater. If one to two liters of water run out of the heater a week, the leak can be anywhere.
Larger amounts of water that leak from a heater after a pipe burst usually do not go unnoticed. If no one finds water damage, the loss of water is likely due to boiling over. The water flows off via an overflow. Pay attention to the flow temperature of the heating.
Larger amounts of water can also escape directly at the burner and evaporate there due to the heat. A damp smell, reminiscent of a washing kettle, indicates such a broken pipe.
Leak detection on the heating system
If less than five liters per week regularly escape, the method described below makes sense. Start at the top radiators and work your way down per floor.
1. Visual inspection of radiator valves. It says "check by sight", but don't just rely on your eyes. Turn the valve all the way up and feel whether it gets wet. Repeat this test with the valve completely closed.

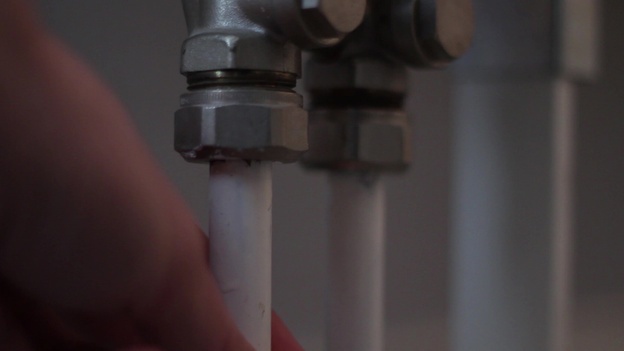
2. Check pipelines. Run your fingers along the inlet and outlet lines of your heater. To be on the safe side, place paper under the heater. This is how you can also find small leaks.
3. Feel the walls. Use the palm of your hand to rub the walls where there are likely to be heating pipes. Pay attention to warmth and moisture.

4. Check heating system. Finally, examine all visible parts of the heater. There are often leaks on components such as the filling hose or the pressure relief valve.

Hire a specialist
If you cannot successfully complete the leak search yourself with a visual inspection, you need a specialist. This is also useful if you suspect that a wall is damp from leaking heating water.
Specialist companies for leak detection detect leaks using moisture sensors or produce thermography with a thermal imaging camera. If this does not help, you usually use test gas. The leak location does not cause any damage and certainly leads to a result. After the examination, you will know whether there is any damage in the lines and where it is exactly.
Thanks to the knowledge of the specialist, you have the opportunity to repair the damage with little effort. You do not need to pry open the wall or floor unnecessarily, it is sufficient to expose the damaged area.
One thing is important: if your heater is losing water, don't hesitate to start looking for leaks. You need to identify and eliminate the cause to avoid further damage.
