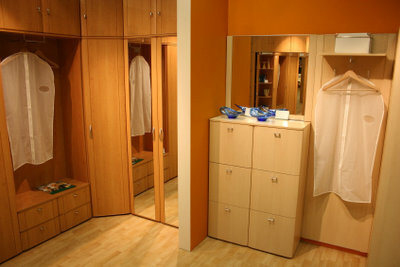
Walk-in closet for sloping ceilings
Most houses have a pitched roof, which inevitably has sloping ceilings with often unused space. Initially, there is a chest of drawers or a double bed, but this does not make optimal use of the available space. Use the space on your sloping roof for a walk-in closet. With the right planning, setting up is pretty easy.
What you need:
- pencil
- Ceiling rail
- Floor rail
- Screws
- Dowels
- Sliding doors
- Spirit level
- drilling machine
- Cordless screwdriver
- Lot
Walk-in closet under the sloping ceiling
- A house with a pitched roof offers you the optimal conditions for the implementation of a walk-in wardrobe under the sloping roof.
- In order to prepare your home improvement project, it is important first of all to measure the space provided for it well and to draw up a sketch. Make sure you don't have any Doors or skylights in your walk-in closet.
- Due to the sloping roof and any side walls that may be included, the foundation stone for your wardrobe has already been largely laid. You now have to decide whether your new walk-in closet should have sliding doors or a partition curtain under the sloping ceiling.
- The more solid and modern variant is undoubtedly the one with sliding doors. The project can be implemented in just a few steps, as sliding doors are ideally suited for the project of a walk-in wardrobe under a sloping ceiling.
Instructions for construction - wardrobe with sliding doors
- The first thing to do is to attach the ceiling rail. Use a pencil to mark the holes on the ceiling using the rail.
- Now put the rail aside and drill the holes at the marked places in the ceiling. Pay attention to the correct drill size corresponding to the dowels. If you have a 6 mm dowel, use a 6 mm drill bit.
- Now insert the dowels carefully into the drill holes with a hammer. Make sure to use dowels with a rim, as these will not disappear into the wall or ceiling if the drill holes are too deep.
- Now screw on the ceiling rail. You can support one end of the ceiling rail with a suitable wooden slat or a longer board. This means that it can also be easily attached to the ceiling by itself.
- With the help of a plumb bob, you can determine the perfect position of the floor rail in relation to the ceiling rail and mark the point where you want to glue or screw the floor rail.
- As a rule, gluing is sufficient, so that also the one that is often present Flooring will not be damaged. Remove the adhesive tape and now press the floor rail firmly along the markings on the floor.
- Finally, bring the panels to size and put them together with the frame profiles of the sliding doors.
- You have now built your basic framework. Then first insert the sliding door elements into the ceiling rail and then place them in the floor rail. The sliding doors only really click into place.
- The sliding doors now have to be adjusted with an adjusting screw. You will need a spirit level for this.
How to install sliding doors in your wardrobe
A wardrobe with sliding doors shows its advantages especially in small rooms: You ...
How helpful do you find this article?