Build nest boxes for titmice
In the warm season, many birds fly around looking for a suitable breeding site. If you own a garden, you can provide the titmice with nesting boxes in a convenient location and watch these cute little birds. How you can build nesting boxes yourself is explained in these instructions.
What you need:
- Wooden panel
- Jigsaw
- Wood glaze
- Screws
- 2 hinges
There are different species of titmouse in the world. Native to Germany, the blue and great tit mainly lives in parks and gardens. They belong to the type of cave breeder and like to raise their brood protected in wall holes, crevices, tree hollows. They are also happy to take on the protection of nesting boxes and not only delight children when the cute little birds feed their noisy offspring. If you are a little technically gifted, you can build such nesting boxes yourself.
The construction of nest boxes
- To get started, make a sketch on a piece of paper and draw a nesting box according to your ideas. The easiest way to build nest boxes is a light, rectangular shape.
- When choosing the wood, make sure that it is slightly roughened on at least one side (later the inside of the nesting box). Tits do not like it when the dwelling consists of smooth walls.
- Cut with a wood saw or a jigsaw from a wooden board (thickness approx. 2 cm) each rectangular a back wall, a front, a floor, a roof, two side elements, a wooden strip for the later attachment in a protected place in your garden.
- Using a compass, draw an entrance hole on the front. For tits, you need to be approx. Take into account 2.5 - 3.2 cm. The great tits are slightly larger than their relatives, the blue tits, and tend to have a larger opening.
- Cut out the opening accordingly. A small runway in the form of a pole is not necessary in front of the entrance. The tits are wonderful climbers and can skillfully hold on to the nest box opening.
- Coat all of the building elements with a weatherproof wood glaze so that you can keep your nest box for a long time. You are also welcome to paint nest boxes in bright colors, but you should not use too bright colors and the signal color red.
- Let everything dry and ventilate well for a few days so that the paint smell disappears.
Do the birds need your help? Hang at least one nest box. With the …
Assembling the individual elements of your tit house
- Then fasten all the elements together with screws, except for the roof. Attach the wooden strip to the intended location in your garden. Pick a point that is not burdened with too much noise and movement. Breeding birds like it well protected, calm and safe.
- Finally, attach the roof with two hinges. You attach the hinges to one edge of the underside of the roof and to the upper end of the rear wall. This gives you the option of removing the old abandoned nest and cleaning the nest box at any time. Don't be frightened if you find an old egg or even a small young animal dead in the nest. Just clean your nest boxes and look forward to the next tit offspring.
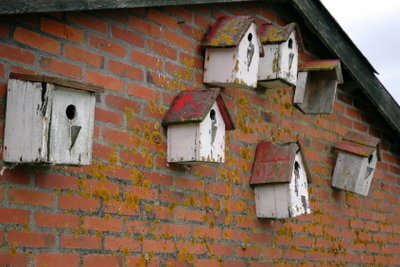
- Attach your finished titmouse to the wooden ledge.
How helpful do you find this article?