
Sewing styles made easy by hand
Not everyone in the household has a sewing machine, but there are always small repairs that you could do yourself. Then it is useful if you know different types of sewing (stitches) that you can also do by hand.
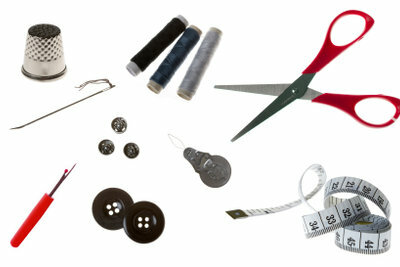
What you need:
- Sewing needles
- Sewing thread
- Fabrics
- Tailor's chalk
- Pins
- thimble
Types of sewing - you should take this into account in general
- sew Along an imaginary line or a line drawn on the fabric with tailor's chalk (it can be easily brushed out again) so that your seam is straight.
- When sewing fabrics with a clearly visible weave, it is best to stick to the course of the thread.
- If you carry out the sewing types with even stitches, the result is a neat picture.
- If you are still a little inexperienced in performing the various types of sewing, you should use a thimble to avoid closing the finger over which the fabric is lying (i.e. not the one holding the needle) prick.
- After each stitch, pull the thread tight, but not too tight.
Quilting - this is how you sew a quilting seam
Quilting a seam does not mean that you have to sew it with the machine ...
- It is best to create a kind of booklet made of countable material in which you can include all samples of the sewing types you have performed. So you can always fall back on it if necessary.
Simple stitches sewn by hand
- Pre-stitch: You work this stitch from right to left. Pierce the fabric with the sewing needle from top to bottom and after about 3 mm (depending on the type of fabric, also before) from bottom to top through the fabric. Pull the thread tight. Repeat this alternately and always at the same distance. If you want to use this stitch as a basting stitch (e.g. to B. to fix a seam that you want to sew on with the sewing machine later), the distance between the stitches can be significantly larger.
- Lockstitch, backstitch (also called stem stitch): Work from right to left. This stitch is very suitable for seams that do not have to be straight (e.g. B. curved). Pierce the fabric with the sewing needle from above and cut through the fabric about 5 mm further from the bottom up. Then prick again from above at a distance of 2.5 mm (not forwards, but backwards) through the fabric and after 5 mm (i.e. 2.5 mm after the previous cut) from bottom to top through the Material. Pull the thread tight. From here on, sewing is now easier because the distance between the stitches can be clearly seen. Such types of sewing result in the same picture on the front and back of the work.
- If you want to clean the edge of a piece of fabric, use the following stitch of the various types of sewing: Work from left to right. Pierce the fabric with the sewing needle from the back to the front (only a few mm from the edge), from there guide the thread over the edge of the fabric and pierce the fabric again from the back to the front. The distances should be fairly close and, above all, even.
- If you want to sew 2 clean pieces of fabric (i.e. pieces with selvage or hem) together, select this stitch from the sewing types: Work from left to right. Put both pieces of fabric together edge over edge and poke 2-3 mm deep over both edges from the back with the sewing needle to the front. Choose fairly close spacing and sew evenly.
Two types of sewing that are a little more complicated
- Hexenstich: This stitch is one of the types of sewing that is particularly suitable for hemming. Work this type of cross stitch from left to right. Choose the stitch size and the distance between the individual "crosses" depending on the type of fabric and your taste (thicker fabrics require larger and narrower crosses). Use the sewing needle to pierce the fabric with a small stitch from right to left (not the folded hem) and then back out again. Then guide the sewing needle diagonally to the top right, pierce from right to left through the lower edge of the hem and pull the thread a little tight. Now guide the sewing needle down to the right (back onto the fabric) and sew a small stitch (pierce on the right, cut out on the left). Repeat this technique until the hem is closed.
- Of the types of sewing for hemming, the one with the hollow stitch is the most invisible. To do this, the preliminary work is to fold the hem, to pin it in place, to baste it with large stitches (see instructions) and to iron it on. Then choose a very thin sewing needle and soft sewing thread. Work from right to left. Fold the hem up a little, pierce the underside of the folded-up hem (just below the Edge, from right to left in a tight leading stitch), then also into the fabric (so now not into the hem). Do not pull the thread tight. Continue loosely sewing in the same way until the work is finished.
How helpful do you find this article?
