
Set up peer-to-peer
In companies, computers are interconnected to form networks. Networking computers also offers many working advantages in private life. To take advantage of these advantages, you can, for example, set up a peer-to-peer network under Windows.
What you need:
- Dual-speed hub or dual-speed switch signal distributor
- One network card or LAN onboard per computer
- One STP or CAT5 UTP cable per computer
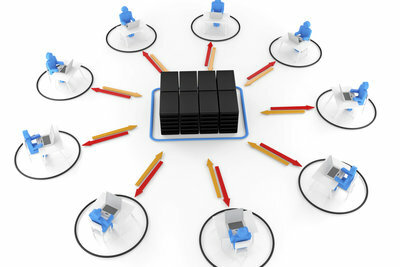
Peer to Peer Network Group - Take advantage of the division of labor
Peer-to-peer home networks combine up to six computers to form a network group.
- From now on, the networked computers use the same hard drives, folders and Drives. Likewise, the P2P ensures connections to the same printer and the computer Internet access. The main idea behind peer-to-peer groups is the division of labor.
- The calculator with the largest random access memory can now be used for storage tasks. You use another specifically for printing tasks and a third is responsible for surfing. Each computer in a household is thus optimally used according to its strengths and weaknesses.
- As a rule, all computers in home networks have equal rights - hence the name "Peer to Peer". The individual resources of the PCs combine to form a total resource that can be accessed equally from every server.
- But there is also the possibility of defining the distribution of tasks. In this case, some of the computers each offer a special service. The other servers use the services provided and are referred to as clients.
- You need a signal distributor to set up the connection between the computers. Each computer also needs a network card and a network cable. If on the Mainboard the computer has an integrated network card, then one speaks of LAN onboard. Additional network cards are then not required. As a rule, a dual-speed hub or switch is used as a signal distributor. Network cables correspond to either STP or CAT5 UTP cables.
If there are several computers with the Windows XP operating system in a household, it offers ...
Ask the hardware manufacturer of your computer for the suitable components or read the manual.
Install hardware - this is how you connect the computers
If you have bought the right hardware, you can now set up your future home network.
- Shut down the individual computers, switch them off and remove the power plugs.
- You now open the housing of the computer with a suitable screwdriver. Pull the cover plate from the PCI slot at the rear.
- Push the network cards into the PCI slot until you hear the card click into place. With LAN onboard you can find the integrated network card.
- You screw the screw of the cover plate to fix it on the card.
- Then close the housing and reconnect the power plug.
- Set up the signal distributor where it can contact all servers without any obstacles.
- Attach the network cables to the network card and signal distributor.
- Now prepare Windows. To do this, go to the Control Panel and then under Network and Internet Connections to Network Connections.
- If everything went well, you will now see a LAN connection. You can now name them and open their properties.
- Under the properties you should see a Client for Microsoft Networks, a file and printer sharing, a QoS packet scheduler and a TCP / IP protocol. If one of the components is missing, install it via "Install", "Service / Client" and "Add".
Your home network group is now set up. Finally, set the Internet options on the Internet server.
Set up the home network - these configurations are necessary for this
The subnet mask and IP addresses must now be specified. You also need folders and printer release. Under Windows XP works with the following procedure. With other Windows variants, minor deviations are conceivable.
- You mark the home network with the right mouse button and click on "Properties".
- Go to "Internet Protocol" and select "Properties".
- Go to "Use the following IP address". Here you assign addresses from the "192.168.0.X" range to the individual computers. Replace the X with a number. Each computer must have its own IP address.
- Set the subnet mask to 255.255.255.0.
- Save the changes by clicking "OK" and close the properties.
- Now click on "Performance and Maintenance" in the Control Panel. Below you will find the item "General information about the computer Show". In the classic control panel view, simply click on "System" instead.
- You go to "Computer name" below. Each computer has its own name, but assign all servers to the same workgroup - the home network. Save the changes with "OK".
- You then share the folders and data of the individual servers by right-clicking on the object you want to share and selecting "Sharing and Security".
- Under this, select "Share this folder / this data in the network". To do this, you have to enter a share name under which you can later find the data.
- Proceed in a similar way to share printers. Open the view of the individual printers under Control Panel. The release takes place via the right mouse button and the release name.
After restarting the system, your peer-to-peer network group can be used. If further releases are necessary, you now know how to proceed. You can find help on forums as well as Network total. Have fun and success with your new network.
How helpful do you find this article?

