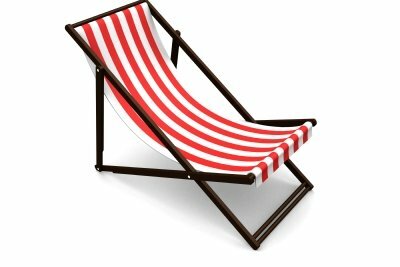
Build your own wooden deck chair
The wooden deck chair with the charm of a hammock lasted for decades and is still up to date. Historical models were constantly being reworked. Grandma and Grandpa rested in it for ages from hard work. Hearty snores startled the chickens. The cat purred around the slippers. A sophisticated folding technique left generations in despair, pinched numerous fingers and survived all hostilities. Simple technology combined with colorful fabric still invites you to relax in the green today.
What you need:
- Hardwood strips beech 30 mm wide x 20 mm thick (see parts list)
- possibly wooden rod made of hardwood
- Threaded rods
- Threaded end pieces (hexagonal cap or round cap)
- Washers
- Wood screws
- Wood glue
- 2 x perforated sheets for the support
- Cotton or awning or Tent fabric (90 cm wide and 150 cm long)
- Cordless screwdriver
- Drill set
- Screwdriver bits
- Upholstery nails
- hammer
- Sandpaper
- possibly grinding machine
Bars for the deck chair
Your wooden deck chair consists of two frame structures to which the fabric is attached. In addition, there is a support made of three parts for the inclination of the lying surface and two-part armrests if required. You can easily change the dimensions of this material list of all beech wood strips for the deck chair. The proposed figures correspond to a model that would have long been “retired”.
- The large inner frame consists of 2 x strips 1350 mm long (long deck chair side from the front bottom to the back top) * and 2 x crossbars 510 mm long (inside the deck chair made of wood).
- The small outer frame has 2 x strips 1150 mm long (shorter deck chair part at the front end of the seat towards the front bottom rear) * and 2 x crossbars 560 mm long (results from 510 mm + 2 x wood thickness + Washers / clearance).
- For the support for the inclined position of the lying surface, cut 3 x strips 560 mm long (2 x vertical struts, 1 x cross bar).
- Now the only thing missing is the armrests of the wooden deck chair when needed. You cut strips for 2 x armrests 400 mm long (horizontal) * and 2 x longitudinal supports 230 mm long *.
- The bars with * can be rounded off at the ends for a better look and grip. Since the 5 cross bars are placed in between, these end faces must remain straight. However, you can round off the long sides of it just as well, especially the front edge of the seat.
Every DIY enthusiast is proud to have their own wooden cradle for the baby. With this simple ...
Assembling the model from wood
- When gluing the two frames (final dimension: 1350 mm - 2 x 15 mm edge distance - 2 x 30 mm material thickness = 1260 mm x 510 mm and final dimension: 1150 mm - 2nd x 15 mm edge distance - 2 x 30 mm material thickness = 1060 mm x 560 mm) place crossbars between the side struts at a distance (15 mm) from the respective end of the strip.
- You pre-drill the holes for the wood screws. This way the wood does not break out. Then coat all connections with wood glue and screw from the outside through the side strips into the end faces of the cross braces.
- Assemble the support in the same way. The open side will later be attached to the deck chair.
- The historical model has notches in the small frame at the back for engaging the support (5th isosceles triangles 20 mm x 20 mm at a distance of 80 mm per triangle tip in the narrow surface of the Side struts). The width of the bar was halved in the area of the triangle tips. You can also glue in round rods for a secure hold and avoid sawing out the triangles. The space when folding the wooden deck chair is sufficient.
- Now connect both frames. For the outer, smaller part, measure 330 mm from the front and 400 mm on the long, larger frame. These are the crucial pivot points for your deck chair. You pre-drill for the threaded rods, place washers between the two parts and screw everything with the end caps. Please make sure that you have good mobility.
- Using the same principle, screw the support on the outside of the longer frame 450 mm from above so that it can move.
- Now drill and screw the armrests on the wooden deck chair. First you connect the two parts for each side in a moveable manner. Then mount the vertical strut on the outside of the wider frame, 120 mm from the end (seat area), with the same flexibility. The cross brace (armrest in the same alignment as the outer frame) is removed or removed 700 mm from the lower end (foot area). Screwed 300 mm above the pivot point.
- The folding technique for the deck chair is now perfect. You screw the two perforated plates on the outside of the support for inclination. These stabilize the deck chair frame. This means that the support cannot shear sideways during construction.
- Now the fabric covering is missing. If you sew the required length of fabric yourself, it is important to choose the right stitch on the sewing machine. You have to expect usage tensions. Either you choose a zigzag stitch with three stitch lengths each or sew this seam several times.
- Now wrap the 100 mm end area well around the upper and lower crossbars and secure the double to triple layers of fabric with upholstery nails.
How helpful do you find this article?