
Correctly position and install glass back walls in the kitchen
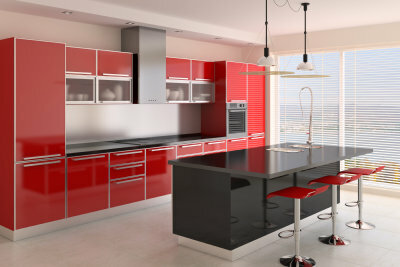
Glass back walls give your kitchen a particularly elegant and modern look. If this splash guard is to be installed over a large area, however, you have to invest a lot, because this kitchen solution is not cheap. It becomes particularly expensive when holes for sockets have to be pre-drilled.
What you need:
- Alcohol or petroleum ether
- silicone
- Glass plate
- Special glue
- Comb spatula
- Smoothing trowel
Mount the glass back panels correctly
Glass back walls are particularly suitable as an alternative to the classic tiled mirror. However, you can also attach the splash guard just behind the hob.
- Choose a suitable glass back panel and have it cut to your kitchen dimensions. Note that not every glass is suitable. You should use toughened safety glass (ESG) in the hob area, as this is where high temperatures arise. If you want a backlit wall, choose glass plates that are already pre-drilled at the four corners.
- Remove the wallpaper where you want to mount the glass plate. You should not stick the plate directly to the wallpaper, the adhesive can dissolve it and it cannot bear the weight of the glass plate. Use a scribing strip next to a craft knife to remove it so that you later have a clean transition between the glass wall and the rest of the kitchen wallpaper.
- Now clean the glass pane with alcohol or benzine.
- Apply an adhesive to the wall surface with a smoothing trowel. Then comb through the adhesive bed with a comb spatula. Only use a special adhesive with a very high adhesive strength that can also support the glass plate. Let us advise you which adhesive is best for large glass back panels.
- Now apply special glue to the back of the glass plate as well. Press the plate in the intended position and fix it with adhesive tape. If possible, you should also place a heavy object in front of it until the glue sets.
- Let the glue dry as instructed, usually the drying time is one day. Remove adhesive residue with a damp cloth and all adhesive tape. Finally, compress the underside of the glass wall with silicone so that no moisture can penetrate.
- If you want to backlight the glass wall, the procedure is a little different. It can be applied directly to the existing wallpaper or Tiles to be assembled. First, attach a slat construction in the form of a rectangular frame to the wall to make space for neon tubes or LEDs. Now attach the lighting to the wall. Now you can attach the plate using special fastening sets for glass back panels.
Small kitchens - this is how they appear more spacious
Not everyone is lucky enough to have a spacious kitchen with a large work surface and ...
How helpful do you find this article?
