
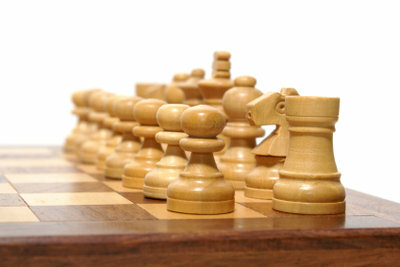
Build a chess table yourself
A real chess player should also have his own chess table. If you don't own a chess table yet and the purchase seems too expensive, then why not build a chess table yourself.
What you need:
- 1 can of wood glue
- 8 long wood screws
- Wood drill bit, 10 mm
- 4 wooden dowels
- 8 adhesive letters, a to h
- angle
- ruler
- Pen
- Special tile adhesive
- Plastic spatula, 1 mm thick
- sponge
- 8 adhesive letters, 1 to 8
How to make a chess table
You build a chess table out of oak and marble tiles.
- For your chess table, cut a 5 cm thick oak board to the dimensions 46 cm x 46 cm. Your small marble tiles are then glued onto this plate. You draw the actual field with an angle and a ruler. The playing field has the dimensions 41 cm x 41 cm. You should draw the playing field in such a way that there are 5 cm on each side to the edge.
- On the back of this oak panel, draw a 5 cm x 5 cm square at each corner. Drill a 10 mm hole 1 cm deep into the center exactly wood.
- Now cut four 5 cm x 5 cm legs made of oak wood to a length of 60 cm. On the sides of the head, drill a 10 mm hole in the middle that goes 1 cm deep into the wood. Wooden dowels are then inserted into these holes, which are then glued into the oak panel together with the legs.
- To reinforce the legs, cut four oak sticks, each measuring 5 cm x 5 cm, to a length of 36 cm. These oak rods will later be screwed between the legs.
- Cut the frame for your playing field on your chess table out of 1 cm x 1 cm oak strips, each measuring 41 cm x 41 cm. The oak strips are mitred at 45 degrees at their ends.
Build a corner desk yourself - this is how it works
Anyone who has ever set up an office knows that office furniture is quite expensive ...
Your chess game pad is assembled
- To give your chess table a firm stand, screw the legs together with the 36 cm oak rods. First, screw an oak stick horizontally between two vertical legs at a height of 30 cm. Do the same with the other two legs.
- Then connect the four legs to each other with the two remaining oak rods. Now screw these rods horizontally at a height of 35 cm to the vertical legs. You made sure that the holes in the legs all come to one side.
- If you have done everything correctly, your basic structure is now in front of you and you can see four holes for the dowels at the top. If so, put wood glue in the holes of your 5 cm thick oak board and insert dowels. Then put wood glue in the holes of your legs and put on the oak top of your chess table.
- Next, glue your wooden strips onto the drawn square on your chess table. Now put the special glue in the inner field of your square. Do not use it too sparingly. Then insert the small marble tiles. You start at the top left with a white tile, then a black tile, then a white marble tile again, and so on. So fill the entire field full.
- If you have installed everything correctly, you already have the pattern of your chess table in front of you. You should now take a 1 mm thick plastic spatula and make a 1 mm joint between the stones. So this joint should be common to all Tiles get lost. Use the spirit level to check that the tiles are all straight.
- If so, wait for the specialty tile adhesive to dry and then mix the grout. Then grout the tiles on your chess table. When the grout has dried a little, wipe the tiles clean with a damp sponge. Finally, all you have to do is add the numbers and letters to the sides of the marble tiles and your chess table is ready.
Let the grout on your chess table dry properly before starting the first batch.
How helpful do you find this article?