
Build a climbing wall in your own garden
When the weather gets better and summer is approaching, the climbers are drawn from their winter quarters - the climbing hall - to the naturally grown rock. But only very few have good climbing opportunities in the vicinity. One solution is to build a climbing wall in your own garden. All you need is a few square meters of screen printing plate, square timber, drive-in nuts and a few climbing holds that are attached to a high facade.
What you need:
- Screen printing plate
- Square timbers
- Drive nuts
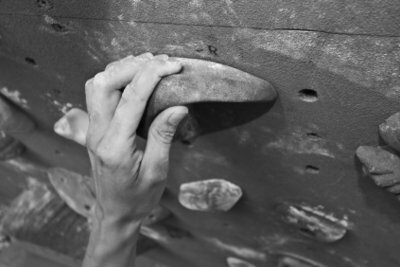
- Climbing holds
- tool
Almost every climber who does not live in the strongholds of climbing has the desire to build his own climbing wall. Instead of spending the weekends on long trips to the coveted routes, you could enjoy the charm of the heights with friends in your own garden. With a little money and a suitable property, this is possible without any problems.
Self-made climbing wall
- The first step towards your own climbing wall is to find a suitable place. A concrete wall several meters high is ideal, but a climbing wall can also be built on bricks and hollow blocks. If there is no high wall, you can think about building a boulder wall. You will then have to forego the thrill of heights, but the implementation saves time and money.
- Go to the hardware store and get 10 x 10 cm square timber and screen printing plates. The amount depends on the planned area. Let us also advise you on how you can best anchor the frame of your climbing wall in the wall. There are various options here, depending on the masonry. You could also use OSB panels as cladding. However, screen printing plates hardly absorb water, which is very important for an outdoor wall.
- You can order the drive-in nuts and climbing holds that are indispensable for building a climbing wall from specialist retailers. You should use around 50 drive-in nuts per square meter of climbing wall.
- After the shopping, it's time to build the climbing wall. But before a frame is screwed to the wall, the panels have to be prepared. In order to be able to always screw new routes later, the plates must be provided with sufficient holes.
- To do this, holes are drilled at a distance of 15 centimeters into which you then drive the nuts. It is true that the wall could also be built with unprepared panels, but the repositioning of handles and steps would then involve laborious alterations. If you want to practice the lead climb on your climbing wall, you can attach the necessary express sets at this point.
- After the panels have been prepared, the substructure is assembled from the squared timber. It is up to you whether you choose a frame or vertical rails. It is only important that the gaps between the bars do not exceed 75 centimeters. Otherwise, the wooden panels would bend strongly during dynamic climbing and, under certain circumstances, break.
- Now you can screw the plates onto the finished frame. Wood screws set every 10 centimeters provide the necessary stability.
- In the last step, you can attach a drill hoe to the stone wall as a means of securing top rope climbing. Pay particular attention to a secure fastening method, as the bolt can save your life in an emergency.
Do you like climbing or bouldering in your life? Maybe you already have ...
Then you can equip the wall with climbing holds and kicks and put your new training opportunity through its paces.
How helpful do you find this article?

