Build a bow and arrow
Vacation time is family time. Parents and children spend their free time together, playing and doing handicrafts at this time. This often results in the desire to shoot a target with a bow and arrow. These toys can be bought in department stores or in the online shop. With a little skill it is also possible to build a bow and arrow yourself. Not only your children, but you too will enjoy shooting a bow and arrow.
What you need:
- Tree branches
- Wooden construction made of plank and round timber
- saw
- Pocket knife or draft knife
- Carving knife
- file
- Sandpaper
- tendon
- Clear coat
- paint brush
- adhesive
- cord
- feathers
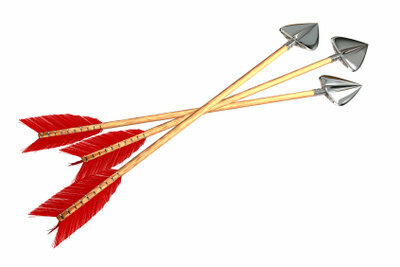
- Arrowheads
Planning the construction of a bow and arrow
- Find the right one with your children wood for bow and arrow. A branch 3 to 4 cm in diameter and 1.50 m in length is best for the bow and branches 1 cm in diameter and 30 cm in length for the arrows. The best time to saw the branch from the tree is summer, autumn or winter.
- Make a sketch of the arch and label each part. It consists of the handle in the middle of the branch and the adjacent upper and lower limbs. The side facing the archer is called the bow belly, the side facing away from the archer is called the arch back. The ends of the arch are called cams.
- Discuss with your children that it takes a few days to build a long-lasting arch. Children get impatient quickly.
- Explain to your children that arrows should not be locked on people. Handcraft In addition to a bow and arrow, you also have a target.
Here's how you can build the toy
- Find the right branches for making bows and arrows. The long branch of the arch must be glued with white glue immediately after the cut to prevent it from drying out and cracking.
- Remove the outer and inner bark with the help of a pocket knife or draw knife. Be careful not to damage the first annual ring. One side of the branch forms the spine of the arch and must remain intact so that the arch does not break.
- Use a carving knife to remove a thin layer of wood from the bow belly. The handle is left out. It remains in the same thickness.
- Bring the branch into the typical arch shape. To do this, attach a piece of round wood to the right and left on a board where the height of the bow bellies should arise. Fasten the handle in the middle of the board and run the branch over the logs on both sides. Tie the ends of the branch to the ends of the board.
- Place the construction in a dry place out of direct sunlight for a few days.
- Now you till the bow. Carve or sand the bow bellies to reduce the thickness to 2 cm. The limbs have to become thinner and thinner from the handle to the end and remain symmetrical.
- File cams 2 cm deep on the sides of the ends of the limbs to attach the tendon.
- Sand the bow and branches for the arrows with fine emery paper.
- Cut a 1.5 cm slot at one end of the arrow branches and work the nock with a file until the bowstring fits in well. The arrowhead is attached to the other end.
How do I build an arch? - How to make an Indian accessory
The Indian bow fascinates the children again and again. How to build your own bow ...
Quit building a bow and arrow
- Paint the bow and arrows several times with clear coat.
- Apply glue to the handle of the bow and wrap it with a cord.
- Saw out a small wooden wedge and attach it to the cord with glue. It serves as an arrow rest.
- Attach the tendon to one side of the bow, pinch it a little, and attach the other end of the tendon to the cam. The bow is now drawn.
- Glue feathers for flight stabilization at the end of the arrows.
- After building the bow and arrow, check that the tendon is tensioned enough and that the arrow flies far enough. If the tension is too low, it must be retightened.
How helpful do you find this article?