Lay the wooden floor on the balcony
A beautiful wooden floor on the balcony not only looks cozy, it is too. Because with bare feet you will feel more comfortable on a wooden floor on your balcony than if the floor is made of cold stone. Of course, you can buy ready-made elements for laying a wooden floor on the balcony. Unfortunately, depending on the size of your balcony, they cost a lot. With a little manual skill, you can also build a wooden floor yourself.
What you need:
- Roof battens
- planed wooden boards
- Wood protection glaze
- broad brush
- Protective film (optional)
- Screws
- Drill press with wood drill
- Cordless screwdriver
- Yardstick
- pencil
- Jigsaw (if necessary)
Build a wooden floor - the preparations
- Think about whether the boards of the wooden floor should run lengthways or crossways on your balcony. At right angles to this, you have to make an underlatten from roof battens. This must be under the wooden floor so that any moisture can dry off and the floor is ventilated.
- Then, after carefully measuring the floor of your balcony, draw a plan. You can already calculate the total length of roof battens required. The lower battens start at one end of the balcony floor, then the second batten follows at a distance of about 1 meter and so on until you have reached the other end of the balcony.
- The total length of the boards required for the wooden floor depends on their width. Since you probably don't know this yet, wait until you get to the hardware store to do the math.
- Take your plan with you and get advice from the specialist staff at the hardware store. They will help you choose the right boards and, above all, their thickness. Also, buy enough screws. Each board must be attached to each individual roof batten with two or more screws.
- If you're lucky, your hardware store will offer a cut to size. In this case, you can have all the slats and boards for the wooden floor cut to the right size.
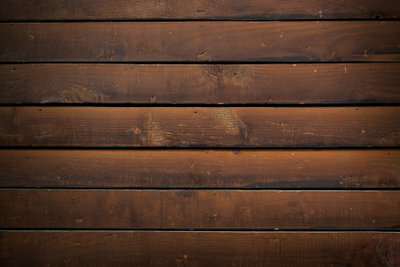
- Then buy wood protection glaze. You can get these transparently but also in different tones. Since you have probably bought light-colored softwood boards, you can use the glaze to give them a warm shade of brown or another color. Make sure that it is a glaze for the outside area. You will need to paint the boards with this glaze before you can lay them. You can also paint after laying the wooden floor. Then, however, you should cover the balcony floor with a thick film before you start building the wooden floor. This means that no glaze gets onto the floor later when it is painted.
Build a cat ladder for the balcony yourself - this is how you help your kitty into the apartment
Cats like to roam around outside, hunt mice and play with everything that happens in the ...
Covering the balcony floor - this is how it works
- First, place the roof battens on the balcony floor. Start on one side of the balcony about 10 cm from the wall, then put about every meter Place another lath on the floor until you - again with a distance of 10 cm - have reached the opposite wall are.
- Now start with the first board, which you lay across the roof battens. Place it across the battens on one side of the balcony at a distance of 2 cm from the wall. Then use the wood drill to drill two holes in the board where it rests on a roof batten. Make sure that the holes are not too close to the board edges so that the wood does not tear. However, they must not be placed too far in the middle of the board, so that the boards do not throw up on the sides later.
- If your balcony is very long, you will have to work with two boards along the length if necessary. In order to set the boards correctly, you will need a miter saw for a clean cut. When positioning, lay the boards offset to one another. So first a long board, then a short one. In the next row you place first the short board and then the long board, etc. With this little trick, the "extension" is not noticeable and at the same time you have a subtle pattern in your wood image.
- Then screw the first board in place. Place the next board next to it with a distance of 1 cm. The boards must not be placed directly next to one another, as they expand when they come into contact with moisture. Pre-drill the appropriate number of holes again. When aligning the holes, use the screws on the previous board as a guide; this creates beautiful straight helical lines.
- The last board should also not be laid directly on the wall, but with a distance of 2 cm. If it is too wide, you will need to saw it to size using the jigsaw. Measure the board beforehand and mark with a pencil line where you have to saw off the board.
- If you haven't already done so, you now have to glaze your wooden floor.
Additional author: Christine Spranger
How helpful do you find this article?