VIDEO: Put 2 pictures on top of each other with GIMP
Make a collage from 2 pictures
-
photos adjust. First, open both of them pictures inGIMP. Check whether the respective image sizes match. Changes in the Image files are uncomplicated (picture-picture scaling).
Photos with the same file size are ideal. © Brigitte Aehnelt -
Define image sections. Use the selection tool to limit the portion of a photo that you want to appear on top of the other keyframe. This can be a rectangular or elliptical, fixed selection. When using the free selection (lasso tool) mark with the mouse the contours.
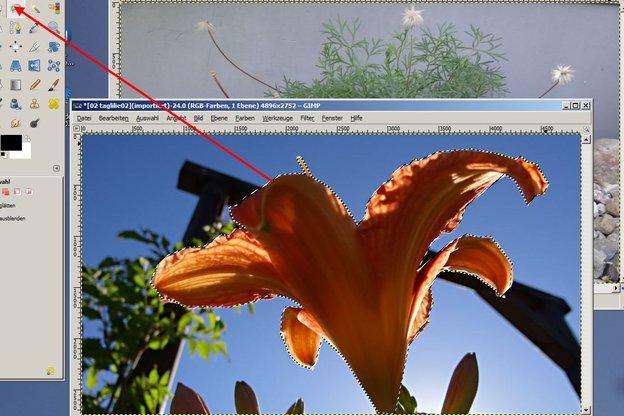
The motif is captured with the lasso. © Brigitte Aehnelt -
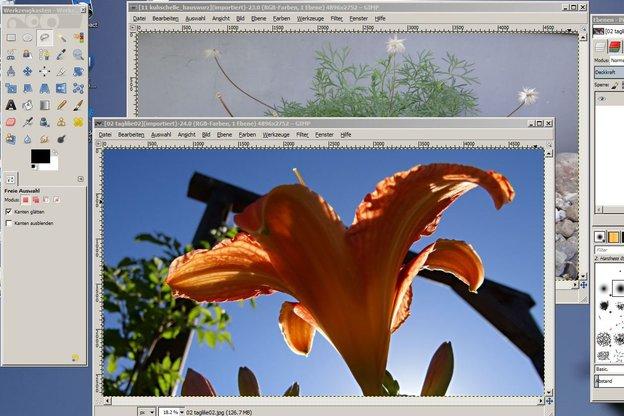
Note the right level. It is ideal if your picture consists of only one layer. If not, choose the correct layer in the Layers window. Hold down the Shift key and mark several layers on top of each other at the same time.

The right level must be observed. © Brigitte Aehnelt -
Copy photo selection to background image. Use the key combination Ctrl + C to copy the marked area of the image. Then switch to the window of the second picture. Now paste the previously copied section into the picture with Ctrl + V.
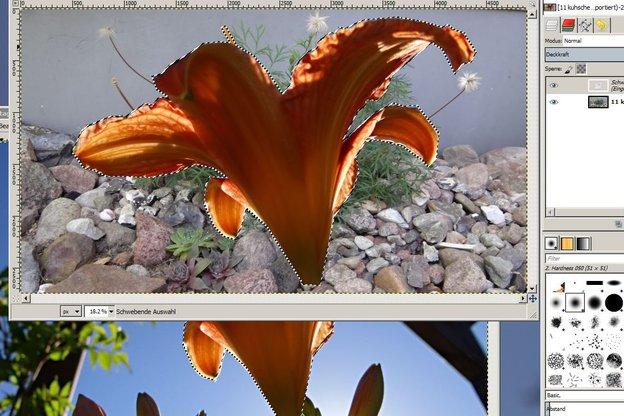
Copy the new layer onto the base image. © Brigitte Aehnelt -
Align a new plane. With the move tool you can now move the section to the right place. You can use the scaling tool to adapt the section to your desired size of the image.
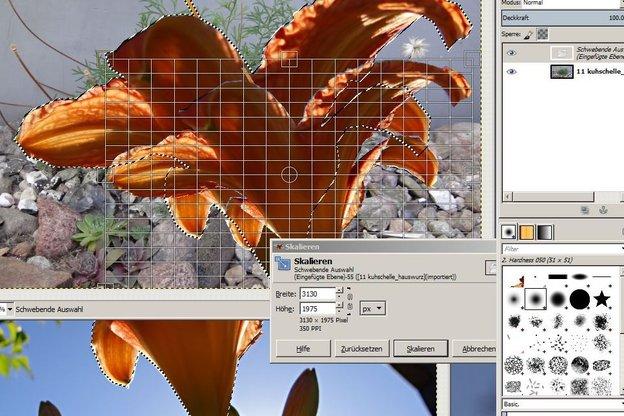
Arrange the subject on the background. © Brigitte Aehnelt
Insert a photo into a picture - this is how it works
With the image processing software "Paint" available under Windows you can quickly ...
Overlay 2 ghost images
In the image editing interesting effects arise through transparent representations. How to design your own personal watermark.
- 2 images or photos should be visible at the same time during image processing. Use the layer transparency for this.
- On the GIMP, paste one image into another as previously described.
- When listing the layers, there is the option "Opacity". Here you reduce the opacity of the inserted image. At 22 percent, there is a very ghostly appearance. The background image shimmers through when the layer above is transparent.
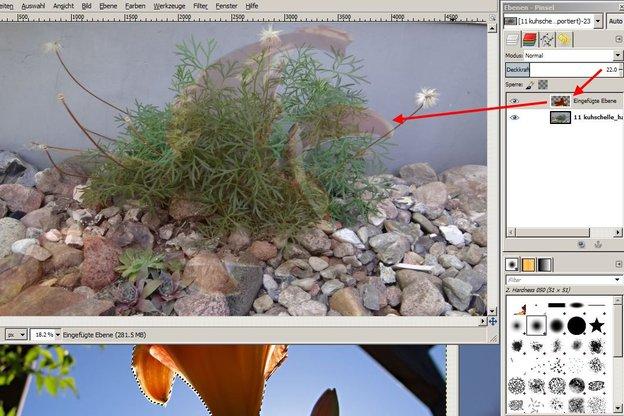
Transparency can create watermarks. © Brigitte Aehnelt