VIDEO: Tinker with salt dough for Christmas
Decorations off salt dough are also very beautiful at Christmas time. It's especially great if you plan to do handicrafts with your children. This article will give you a particularly simple basic recipe for salt dough and two suggestions for how to do it Handcraft shown by Christmas decorations.

Salt dough - basic recipe
The great thing about this recipe is that you don't need a scale. The only thing you need is a cup or mug.
- Pour 2 cups of flour into a bowl.
- Now add the salt and mix it with the flour.
- Now add the water and oil and knead everything into a smooth dough.
- If you like it colored, you can add a few drops of food coloring and knead well. Complete!
- The salt dough does not have to rest, you can now process it.
You can also do handicrafts very well with disabled adults. When it comes to the type of handicrafts ...
Craft ideas for Christmas - tree decorations made of salt dough
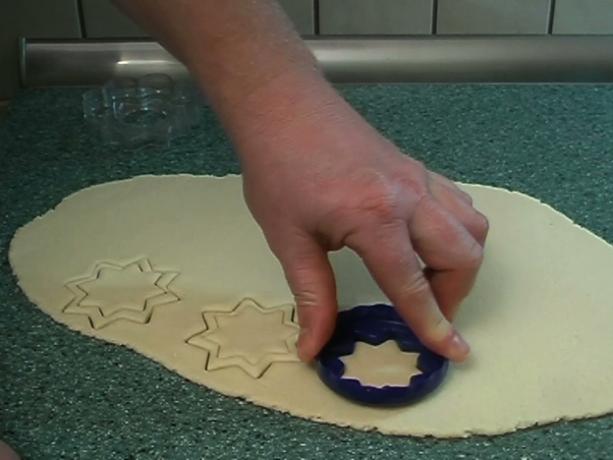
See really great pendant made of salt dough for the Christmas tree the end. This craft idea is really easy. You need a rolling pin and cookie cutter (
Stars in two different sizes, hearts in two different sizes, etc.)- Roll out the salt dough and cut out shapes. Here, 2 different sizes are used per pendant so that the tree decorations only consist of the salt dough edge. The salt cookie should be hollow inside.
- Carefully place the salt dough tags on a baking sheet (don't forget parchment paper).
- The savory biscuits must now pre-dry for 24 hours at room temperature.
- The next day, heat the oven to 50 ° C and dry the tags in the oven for about 1 hour. Make sure that the salt dough tags don't turn too brown. You look best when you stay very light.
- To be able to hang the salt cookies on the tree, attach red ribbon to it. Complete!

Angels made from salt dough - instructions
These angels made of salt dough are a real eye-catcher and well suited for children who are a little taller. The angels can be made in any size, so no exact dimensions are given.
- Do not roll out the salt dough too thinly and prick with a glass or something similar. Ä. a circle. The size can be chosen here as you wish.
- Now cut the circle in half with a sharp kitchen knife.
- The semicircles are the clothes for two angels. Fold the semicircles together to form a cone. Press the edges firmly in place.
- You can now shape the lower edge of the cone a little outwards. This is how the angel dress looks slightly curved at the bottom. In addition, the figure can stand better this way.
- Now shape a salt dough ball to the size of the cone and attach it to the top of the cone. This ball is the angel's head.
- Now cut out small angel wings and attach them to the back of the angel (where the "seam" of the cone is).
- The salt dough gel must now dry as described above. However, these figures should stay in the oven for up to 2 hours, because they are a lot more massive than the tree pendants above.
- After baking and cooling, paint the angels as you like. A friendly face is drawn with the fineliner. The angel hair is glued on. Complete! These angels are also a great little gift for Christmas, e.g. B. for grandma.
At Christmas there are really many ways to decorate the house with great handicrafts made from salt dough. Take these two suggestions as stimuli for your imagination and let your imagination run wild.