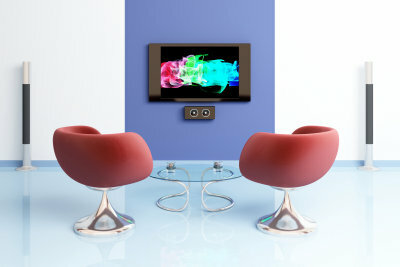
Build a TV wall yourself
A TV wall is not only a nice way to mount a TV on the wall, it is also practical because you can hide the cables and connections behind it. With a little skill you can build a TV wall yourself.
What you need:
- 19 mm MDF panels
- 2 panels for the wall
- Reinforcement plate 90 x 20 cm
- 4 shelf walls 25 x 16 cm
- 4 shelves 90 x 16 cm
- 2 shelves back wall 90 x 29 cm
- Wood screws 2 x 35 mm
- 4 times solid wood 6 cm wide, length corresponding to the wall plate 4 cm thick (A)
- 2 times solid wood 3 cm wide, length corresponding to the wall plate 4 cm thick (B)
- Wooden spatula
- Joint tape
- primer
- Color / wallpaper
- Tool:
- Table saw
- Orbital sander
- drilling machine
- Cordless screwdriver
- Wood drill / possibly Sinker
- Sandpaper
- Folding rule
- pencil
- spatula
Construction and fastening of the TV wall
Depending on the size of the TV wall, use two or more chipboards next to each other, which you attach to the wall with strips. The back wall is designed according to your wishes and equipped with the shelves - an advantage if you build yourself.
- Cut the retaining strips for the bracket from part A by dividing them lengthways at a 45 ° angle. Dowel one part to the wall exactly horizontally.
- Place the panels for the rear wall exactly aligned on the work surface and mark the position of the strips. Make sure that the strips that you screw onto the rear wall connect them exactly to one another, so that there is no shift or gap.
- Divide part A, which will be placed on the back wall, and parts B and screw them onto the back walls, parts B should sit at the bottom edge and roughly in the middle of the panels.
- Since the television is very heavy, you have to screw on a reinforcement plate at the point where it will later be attached with a special bracket.
- Assemble two boxes from each of 2 shelves and side parts, placing the narrow pieces between the large pieces and screw the rear shelves onto these frames.
- Now screw the shelves to the large panels by screwing the back panels of the shelves to them. Depending on the type of design, you can only carry out this step later.
Build desk top yourself
When space on the desk is tight, storage space is urgently needed. At the …
Tricks for building the TV shelf yourself
- All screws must be completely in wood to be given away. For this reason, you should pre-drill the necessary drill holes with a larger drill about 2 mm deep.
- So that you finally get a uniform wall, you have to fill the crack and then put on a suitable joint tape before you fill the entire wall. You can also build a very large TV wall yourself.
- You can connect a small TV wall with the spacer strips and the hanging strips and finish them in the workshop. This can hardly be handled with larger walls. In that case, hang the walls next to each other and screw them to the wall strip and to strips that you place on the distance rails from behind. Then place the wall after the Assembly done.
- Make holes in the wall through which you can pull the necessary connection cables. If sockets are to be integrated behind the wall, you have to make the spacer strips and the retaining strip correspondingly thicker.
- Pull all cables through the corresponding holes during installation on the wall of the room and secure them against falling out. Or put cords through the holes that will help you pull the cables through later. This is especially important if the TV wall is big enough to be screwed tightly to the wall.
Finishing the TV wall that you build yourself
- Break up the edges by running sandpaper over them. Trowel the screws, seal the gap between the panels and smooth all edges. After a suitable drying time, mask the gap with the joint tape and prime the wall.
- ribbons You smooth everything with an orbital sander and by hand with a sanding block.
- paint The wall in the color you want. Here you should use a spray method. The alternative is to design the wall with a photo wallpaper and only then to attach the shelves, which have to be finished with the exception of the rear wall.
- Screw the shelves through the rear wall panels, fill the screws through the rear wall and finally paint it.
How helpful do you find this article?