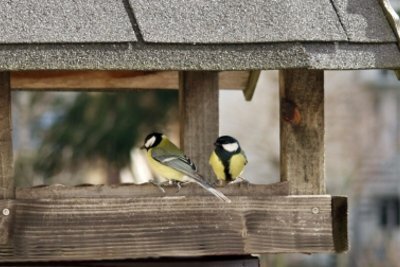
Build a tit incubator yourself
As a rule, tits do not necessarily need a tit incubator to bring their children into the world and to raise them safely. Unfortunately, the natural habitat of birds is decreasing more and more, this has to do with the deforestation of forests and the high rate of development. If you have a heart for birds and find that your tits have no place to nest, then you should build a tit incubator and help the birds.

What you need:
- Solid wood with a board thickness from 20 millimeters
- Jigsaw
- drill
- Hole saw if available
- hammer
- Nails
- Hinges
Build the tit incubator
- First you should sketch out all the necessary parts on the wood.
- For the tit incubator you need a floor, a back wall, a front wall, two side walls and a roof.
- Draw the floor measuring 14 x 16 centimeters, the roof 20 x 24 centimeters, and the back wall 14 x 29 centimeters, the front wall with 14 x 27 centimeters and the side panels with 29 x 20 centimeters on the Wood.
- Now you can carefully saw out the parts for the tit incubator with a jigsaw. Saw off the side walls at a slight angle so that no water collects on the roof. Water can cause mold. Think about the safety precautions.
- In order for the moisture in the box to drain away, you should drill holes in the bottom.
- Use the drill and an 8 millimeter drill bit.
- You should now drill an entrance hole in the front wall. You can saw this out with a hole saw. The diameter should be 34 millimeters.
- You can also saw out the entrance hole of the tit incubator with a jigsaw.
- The hole should be so big that the tits can easily fly in and out, but the opening must also protect the birds from predators.
- Process all parts with a rasp. You can roughen the wood a little by simply rasping in the opposite direction of the wood. This allows the birds to hold on to the wood better.
- Now you can connect the bottom and the side walls together.
- Now insert the front wall between the side walls.
- You should attach the roof of the box with hinges so that it can be opened easily.
- To protect the nest box against moisture, you can paint it with an eco-lacquer.
Redtails have become rare. They belong to the endangered species. With …
Attach the tit incubator
Now you have built the tit incubator. You should now attach it to a tree.
- Make sure to point the flight hole to the southeast.
- Hang the tit incubator high enough to provide protection from enemies.
- You should still be able to reach the box because it has to be cleaned once a year. You should do this between September and October, because then the breeding season is over.
- If you observe that the box is used by the tits in winter, you should clean it in February.
- If you hang up the tit incubator in autumn, it can then be used as a place to sleep.
- A rain-protected place for the tit incubator would be very useful.
- To the box in front Cats To protect it, you should hang it freely on the tree, but it should not be able to hit the tree trunk in the wind. That would terrify the tit babies very much.
Begin feeding the birds bird seed in early fall. They will be visited by birds all autumn and winter and thus contribute to bird protection. You can of course build multiple tit incubators for your garden.
How helpful do you find this article?


